KSJ Studios // Kay Saint Joseph
This is my website. I post about video game dev, operating systems, and other stuff I like.
Hosted on Vultr using OpenBSD / httpd. Website written in mdbook.
Want to contact me? –> kay at kayjoseph dot xyz.
-Kay (she/her)
Running a Mnecraft Server on OpenBSD
All the cool kids use OpenBSD to host their Minecraft servers. You do want to be cool, right?
Intro
This is a (hopefully) helpful guide to setting up a Minecraft server on OpenBSD. I initially did mine on OpenBSD 7.7, hosted on a Vultr instance. This guide is intended for people with some knowledge of Unix-like systems, but maybe not OpenBSD itself. I’ve tried to include a rationale and explanation for every step, even the “obvious” ones.
This guide assumes you have a working OpenBSD base install, with access
to a command line. It also assumes a publicly facing server. Commands prefixed
with # are to be run as root and commands prefixed with $ are to be run as
the standard user. This guide also assumes you are using ksh for your shell
(or at least something else POSIX ish) – anything fancy like fish may not
work as expected.
This guide uses PaperMC. Paper is a Minecraft game sever allowing a high level of configuration and performance optimisations.
System Setup
Before doing anything Minecraft related, there’s a few steps in the OpenBSD system itself that need to be taken.
Install Java
Minecraft (the good version, at least) is a Java program. Therefore we need to install Java. Like with most Linux/BSD systems, this is easy to do with the package manager:
# pkg_add jdk
...
Ambiguous: choose package for jdk
a       0: <None>
        1: jdk-1.8.0.462.b08.1v0
        2: jdk-11.0.28.6.1v0
        3: jdk-17.0.16.8.1v0
        4: jdk-21.0.8.9.1v0
Your choice:
...
Then pick the required version – I used jdk-21 (as in, I entered ‘4’
when prompted for a choice) and it works fine. The rest of the guide is
based on jdk-21.
Path Java
Unlike in many Unix-like OS’s, OpenBSD does not automatically add Java
to the path. The following environment variables will add Java to the
path. This guide sets them later on, though they can be set in ~/.profile.
They are noted here for ease of reference.
PATH=$PATH:/usr/local/jdk-21/bin
JAVA_HOME=/usr/local/jdk-21/
These flags are for jdk-21, other versions will likely have a
different name for the JAVA_HOME folder (i.e a different version
number. Though the output is verbose, pkg_info -L jdk can give some
clues as to where the JAVA_HOME and bin/ directories are.
login.conf / cap_mkdb
OpenBSD is conservative in its defaults. When I tried to run Java with
more than 1G of memory, it failed to launch with a allocation error. To
correct this, in /etc/login.conf I edited the default class.
default:\
        ...
        :datasize-max=unlimited:\
        :datasize-cur=unlimited:\
        ...
This tells the system to give users who are in the default class as
much memory as they want – given Minecraft is fairly memory hungry,
this is important.
To apply these changes, the following command creates the
login.conf.db.
# cap_mkdb /etc/login.conf
We could also create a specific minecraft login class, and set the
memory / path here. There are two reasons I haven’t done this: 1) I want
the default class to have unlimited memory anyway, given my user is
part of it; and 2) the path is being changed later on in a way that is
more clear.
pf
We will be running Minecraft on a publicly accessible server. Therefore
we need to open ports in the pf firewall. Minecraft runs on port
25565 so we will be using that. Some will advise running it on a
different port to deter hackers, but this is pointless security through
obscurity – a correctly configured server should be safe to open to the
world; if it isn’t, you have bigger problems than port numbers.
To open our port, we need to add the following line to /etc/pf.conf.
pass in on egress inet proto tcp from any to any port 25565
This allows traffic in via tcp from any IP through port 25565. To make this change take affect, we need to reload the rule set.
# pfctl -f /etc/pf.conf
Minecraft on System
After all the talk of login classes in the last part, it’s now time to get into the actual Minecraft user and required Minecraft specific setup.
Minecraft User
To run our server, we will be using a separate user. This is to ensure a
minimum level of privilege separation. If we used our standard login
user, a bad actor who manage to hack the server would then be able to do
everything our standard login user could do. This isn’t an impossible
scenario – log4j comes to mind as a recent example of an RCE in Java.
By using a Minecraft specific user (who we do not trust), and giving
them limited privileges, we are protecting ourselves from this type of
vulnerability.
The easiest way to add a user on OpenBSD is with simply by running the following:
# adduser
This provides an interactive way to, surprisingly, add a user. Most of the options are up to your discretion, but the important ones are:
Enter username: _minecraft
Enter shell csh ksh nologin sh [sh]: nologin
Login class auth-defaults auth-ftp-defaults daemon default staff [default]:
This guide is based on the user being _minecraft. You can call them
something else, but ensure this is changed in the following steps. The
nologin group is designed for system users who do not login – such as
our Minecraft user. The default class is suitable for our Minecraft
user. Note that in previous steps, we adjusted the memory that default
class can use, hence why we use it now.
doas -u _minecraft
Append the following into /etc/doas.conf, substituting <main_user>
with your main login username.
permit persist keepenv <main_user> as _minecraft
This allows you to then use doas -u _minecraft to run commands as our
Minecraft user. For those unfamiliar with OpenBSD, doas works like
sudo but is much, much, easier to configure.
A further convenience step is setting up an alias, such as
dum=doas -u _minecraft in your own ~/.profile. Given that we can’t
login as _minecraft, but are going to be doing a lot of work as them,
doing this alias saves a lot of time.
Henceforth, unless otherwise specified, all $ commands are run as
user _minecraft.
/var/minecraft
We now need a place to actually run our server from. I use
/var/minecraft.
# mkdir /var/minecraft
# chown _minecraft:_minecraft /var/minecraft
# chmod 755 /var/minecraft
This creates the directory, gives it _minecraft, then changes the read
access to all users. We will be making this stricter once setup is
complete, but for now it makes life a lot easier.
Minecraft Setup
wget paper
We’re now ready to start dealing with the server itself. We can download
the PaperMC jar into our Minecraft home, /var/minecraft. For the next
steps, I assume your working director is this.
Paper very kindly provide a direct link to download this, making it
usable with wget. I have not provided a link to this – it is up to
you to find it and verify you have got the right URL.
$ wget -O minecraft/server.jar <papermc-server-url>.jar
start.sh
To start Minecraft, it is helpful to use a script. Here’s one I made
earlier. This script assumes you are giving Java 2048M of memory to
use – if this is not the case, please change this to reflect your
system. We will be looking at more tailored Java launch flags later on.
!#/bin/sh

PATH=$PATH:/usr/local/jdk-21/bin
JAVA_HOME=/usr/local/jdk-21/
JAVA_FLAGS="-Xmx2048M -Xms2048M"

umask 077

java $JAVA_FLAGS -jar /var/minecraft/server.jar --nogui
You will note we have (finally!) added the Java file location to our
$PATH here.
This file will need to be executable. I also recommend removing unnecessary permissions from it.
# chmod 700 /var/minecraft/start.sh
This limits start.sh to only be read, written, or executed by
_minecraft.
First Launch
The big moment.
$ ./start.sh
From here, we will now have the server console available – we can use
this for all the normal Minecraft commands like /op, /tp,
/weather, etc. We can also see the chat log and notable events like
player deaths and testificate deaths.
Once the server starts completely, so we can move onto configuration of the created files, simply tell it stop in the Minecraft console
> stop
Configuration - Refer Appendix 1
A lot of people, a lot smarter than me, have written multiple guides on server optimisation and configuration – including Java flags, plugins, and config file editing. I’ve put some of my favourites in Appendix 1. This is the time to do it.
Fix Permissions
After doing our configuration, now is a good time to change the permissions and restrict the folder (and everything within) back to our Minecraft user.
# chmod -R go-rwx /var/minecraft/
This command is one of those that, if run in the wrong place, can kill your system. Please ensure you only run it on the Minecraft folder.
Background running with tmux
Currently, we can get Minecraft running in the foreground of our ssh
session. If we close the session the server stops. Not ideal. Luckily,
we have a way around this.
By using tmux we can run Minecraft in the background, whilst still
having console access if we need it. It’s as simple as running:
$ tmux
We then just run the server start script as usual in the tmux window.
$ ./start.sh
Then, Ctrl+B followed by d will “detach” our tmux window and leave Minecraft running in the background. If we need to use the server console again, we can use the following commands.
$ tmux ls
$ tmux attach -dt <session_id>
tmux ls gives the session ID for our tmux session that’s running the
server, and tmux attach -dt opens it back up.
Conclusion
We now have a running Minecraft server. All that’s left to do is add the server in your Minecraft client and play! And monitor performance, adjust settings, manage user access, prevent griefing, apply patches, stay on top of costs, manage hardware/software, and do everything else that comes with a publicly accessible server.
Enjoy!
Run into any errors? Something didn’t work like I said it would? Think I’m an idiot with no business running servers, nevermind writing guides about it? Let me know: kay at kayjoseph dot xyz.
Appendix 1 - Tinkering
Basic Security
Two tips for a small server with known members (i.e a friend group):
- Avoid
online-mode=falsein yourserver.properties. There are legitimate use cases for this setting, but this guide does not cater to them. - Use a whitelist. Enforce this in
server.propertieswithwhite-list=trueandenforce-whitelist=true. If you need to whitelist someone, use/whitelist add usernamein the server console or as an op.
Optimisation guides
- Aikar’s flags:
remember when I talked about Java flags earlier? This is where you get
them. I have had issues with these flags before, but I suspect that
was a case of user error. To use these, simply run the script and
replace
JAVA_FLAGS="..."with the flags in the command. - Paper Chan’s optimisation guide: This is an excellent guide on the various settings that can be changed in Paper to improve performance.
Markdown Converter
Sometimes I write books (or try too, at least). I write in a single markdown file because I find this works for me.
This does, however, pose a problem. You’ve probably notied this website is a
mdbook instance that I’ve used as a blog. Needless to say, I think mdbook
is really cool.
Unfortunately, mdbook isn’t great for single markdown files – by which I
mean it doesn’t work at all. I had a quick look on the web, but couldn’t find
anything that would convert for me quick and easily. So I wrote my own.
In the spirit of free software, the code is below. Whilst I’d prefer to use
PyQt, I had a project going on at my real work that needed tkinter so I used
this as a little practice.
Any problems? Let me know at kay at kayjoseph dot xyz.
#!/usr/bin/env python
'''
Markdown to mdbook converter
Kay Saint Joseph
This program is licensed under the GNU General Public License v3
'''

from tkinter import *
from tkinter import ttk
from tkinter import filedialog
import sys
import os

## convenience function
def read_file(fname) -> list:
    with open(fname, 'r') as f:
        return f.readlines()

## removes comments from the readlines book. Comments are HTML "<!-- ... -->"
def remove_comments(f_lines) -> list:
    comment = False
    ret = []
    for line in f_lines:
        if "<!--" in line:
            comment = True
        if not comment:
            ret.append(line)
        if "-->" in line:
            comment = False
    return ret

# take lines of book. return list of mdbook style SUMMARY.md
def create_summary(lines: list) -> list:
    summary = []
    titles = filter(lambda x: x[0]=='#', lines)
    for title in titles:
        section = len(list(filter(lambda x: x=='#', title)))
        name = title.lstrip(' #').rstrip()
        md = get_chapter_md(title)
        if section == 1:
            summary.append("# {}".format(name))
        else:
            summary.append(" - [{}]({})".format(name, md))
    summary = list(map(lambda x: x+'\n', summary))
    return summary

## takes every line in book and returns dict {chapter name: [line 1, line 2]}
def create_chapters(lines: list) -> dict:
    ret_dict = {}
    chapter_title = ""
    chapter_text = []
    for line in lines:
        if line[0] == '#':
            if chapter_title != "":
                ret_dict[chapter_title] = chapter_text
            chapter_title = line
            chapter_text = []
        else:
            chapter_text.append(line)
    else:
        ret_dict[chapter_title] = chapter_text
    return ret_dict

## Take a chapter name such as "The Bog" and turn it into a md file name like
## "thebog.md"
def get_chapter_md(s: str) -> str:
    s = s.lstrip(' #').lower().replace(' ', '_')
    s = ''.join(filter(lambda x: x.isalpha() or x==' ', s))
    s = s + ".md"
    return s

## Add a front page for the mdbook
def write_preamble(s: str):
    with open("src/preamble.md", "w") as f:
        f.writelines(s)

## where the actual work is done
def convert_to_mdbook(book_name: str, author: str, main_md="./main.md", ):
    book = read_file(main_md)
    book = remove_comments(book)
    summary = create_summary(book)
    book = create_chapters(book)
    preamble = ['# ' + book_name + "\n\n", author + "\n"]
    write_preamble(preamble)


    with open("src/SUMMARY.md", "w") as f:
        f.write("[{}](preamble.md)\n".format(book_name))
        f.writelines(summary)
    for (k,v) in book.items():
        fname = "src/" + get_chapter_md(k)
        with open(fname, "w") as f:
            head = "<b>" + k.lstrip(' #') + "</b>\n\n"
            f.write(head)
            f.writelines(v)

## GUI
class App(Frame):
    def __init__(self, master):
        super().__init__(master)
        self.pack()

        ttk.Label(text="MD Booker").pack(pady=10)

        self.t_cont = StringVar()
        self.a_cont = StringVar()
        self.main_md_file = StringVar()

        ttk.Label(text="Title").pack(pady=10)
        self.title = Entry(textvariable=self.t_cont).pack(padx=10)
        ttk.Label(text="Author").pack()
        self.author = Entry(textvariable=self.a_cont).pack(padx=10)

        self.file_label = ttk.Label().pack(side="right")
        self.md_button = ttk.Button(
            text="Pick Markdown File", command=self.md_filepick
        ).pack(pady=10)

        ttk.Button(
            text="Run",
            command=self.process
        ).pack(side="left", pady=10)
        ttk.Button(text="Quit", command=kill_fail).pack(side="right", pady=10)

    def get_title(self):
        return self.t_cont.get()

    def get_author(self):
        return self.a_cont.get()

    ## take the GUI entered info and run the converter itself
    def process(self):
        t = self.get_title()
        a = self.get_author()
        f = self.main_md_file.get()

        if t != "" and a != "" and f != "":
            # print("Title: " + t)
            # print("Author: " + a)
            # print("Main Markdown File: " + f)
            convert_to_mdbook(t, a, main_md=f)
        else:
            raise ValueError("Boxes Empty")
            ttk.messagebox.showinfo("Error", "Boxes Empty")

        sys.exit(0)

    ## pick the main book markdown file to convert
    def md_filepick(self):
        i_dir = os.getcwd()
        filename = filedialog.askopenfilename(
            initialdir = i_dir,
            title = "Pick File"
        )
        self.main_md_file.set(filename)
        self.md_button.config(text=filename)
        return filename

## Option setter from entered args
class Opt():
    def __init__(self, args):
        self.is_gui = False

        if "-h" in args:
            raise UsageError
        elif "-g" in args:
            self.is_gui = True
        else:
            if len(args) != 7:
                raise SyntaxError("Error: too many arguments")
            for i in range(1, len(args)-1):
                if args[i] == "-a":
                    self.author = args[i+1]
                elif args[i] == "-t":
                    self.title = args[i+1]
                elif args[i] == "-f":
                    self.md_file = args[i+1]
                else:
                    continue

class UsageError(Exception):
    pass

def kill_fail():
    sys.exit(1)

def usage():
    print(
'''\
MD Converter: a utility for turning a single markdown book into an mdbook
compliant setup.
Usage:  mdconverter -g
        mdconverter -a <author> -t <title> -f <single_markdown_file>
        mdconverter -h
'''
    )
    kill_fail()

def main(args):
    try:
        opt = Opt(args)
    except SyntaxError as e:
        print(e)
        usage()
    except UsageError:
        usage()

    if opt.is_gui:
        root = Tk()
        gui = App(root)
        gui.master.title("MD Book Converter")
        gui.mainloop()
    else:
        try:
            convert_to_mdbook(opt.title, opt.author, main_md=opt.md_file)
        except:
            usage()


if __name__ == "__main__":
    main(sys.argv)
Death’s Season
Someone leaves a voicenote, from deep in the forest, begging for help. A woman answers.
A game by KSJ Studios // Kay Saint Joseph. Made for the Yogscast Jingle Gamejam. The full version is availble on Itch.io, playable in browser.
This was the first real game I made. The jam ran from the 1st of December to the 8th of December, 2025. All the assets (except the music and font) were made by me in the 7 or so days. I have since tinkered with it, just to add a little polish.
It didn’t score too well overall, but I wasn’t too surprised as horror games tend to have a specific audience. It also didn’t help that the game jam was for the festive season, rather than Halloween. There’s a couple of technical issues, but all things considered I’m really proud of it.
The comments from those who did like it were positive. The dialogue, atmosphere and story got high praise – these were I skills like to think I had before the jam started (as opposed to the pixel art and using Godot for a real project), so to receive these reviews was great.
Mother’s pixel art was my favourite – unfortunately it wasn’t staged well within the level, so players didn’t see it in its full glory.
The tight time limit forced me to stick with the first thing I did. There was no time for corrections or looking backwards. If it was done, it was in the game as it was. It also forced me to review the scope of the game. The initial plan included choices and multiple endings – these all got scrapped (though I have retrospectively added some of these back in).
Even the story, for instance, was a snap decision. The theme (being “if you can’t beat them, join them”) was announced at 5PM, and as soon as it came out I had to pick a game direction. By around 6:30PM I was programming and designing characters for the game I’d picked.
I was undoubtedly inspired by Ready or Not’s level Carriers of the Vine. There was a concern that the inspiration stretched into straight plagiarism – again though, once I had picked the game direction there was no time to go back. In the end, I think Death’s Season took enough of a different direction that those worries were unfounded.
I’d do a game jam again – maybe not December though, as doing a 9-5 then a 6-2 at Christmastime wasn’t ideal.
- Kay
Seasick
“… you can’t run forever, Cap’n. Sooner or later you run out of ocean to sail. The edge of the map seems far away, but so does a maelstrom till you tilter on the precipice…”
Presenting: SEASICK – a horror videogame by KSJ Studios // Kay Saint Joseph. A sea captain ruled by fear runs from a mistake. But can she ever outrun her sin?
Play as The Captain, steward of The Amber Plague, as she sails the Labyrinthian Sea trying to escape. Travel through uncertain waters and the immaterial; fight for survival; and search for undeserved peace.
Follow along with development through my updates below:)
First Steps
I created the “minimal debug version” today – a main menu with usable buttons; that leads to a small map where the player can control a sprite with very basic movement; and all with music playing.
As the above would require, I also created the main sprite of the the player character’s ship. Pixel art always intimidates me, but once I’m in the zone I love making it. Ask me again in sixteen ships time though…
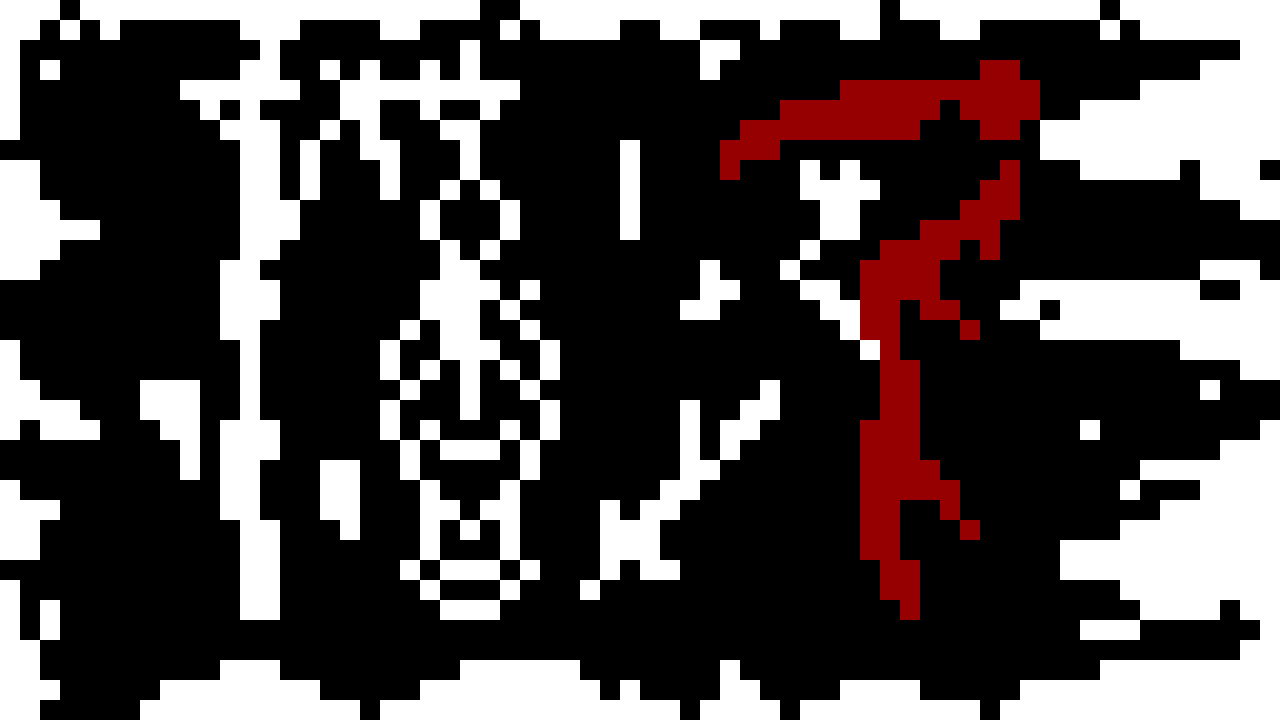
I also designed a flag for The Amber Plague. I’m sure you will agree, this would strike fear into the heart of any sailor unlucky enough to see it.
Tune in next time to see how the more advanced movement controls for the ship go.
Movement & Fun With Classes
I got the movement working pretty nice. The ship accelerates and decelerates slowly, like a ship would. It’s probably a bit sluggish to be “fun” for a player – but since when do game devs like me care about the player? The player is an abstract concept that exists to interfere with my vision.
In any case, the framework is there to tweak as required until it is fun.
In a separate breakthrough, I watched a Youtube video on classes and
refactored a lot my ship code into a class for Ship. This includes methods
for – among other things – getting the
direction the ship is facing, picking an animation to play, and
the the movement code. The values for speed and accel are even exported,
if you can believe that.
At some point, I managed to introduce a bug that killed The Amber Plague’s
movement speed. Given that the movement mechanics had worked well until this
point, I was a more than a little concerned by this. However, after poring
over the new class to find the code that didn’t like being
refactored, I eventually noticed that _process in The Amber Plague’s script
had changed to _physics_process.
This must have been the Godot’s editor’s fault. Clearly, it had followed my keystroke instructions when it should’ve just known what I really wanted to do, and done that instead.
Anyway, onwards – next on the todo list, tilemaps.
More Movement! More Sprites!
I didn’t do tilemaps.
To avoid doing tilemaps, and to celebrate the previous update’s movement advancement, I instead drew some shiny new sprites. This means the ship can now face directions – sailing up, sails up. Sailing left or right, sails left or right. Sailing down? That’s right! The Amber Plauge sails down.
There is a slight issue with the sprites, in that the depth and perspective is off. Left and right are fine, but up and down are driving straight out the water or straight into the water. On an almost perpendicular plane. I also think that the rear view of The Amber Plague is too bulky compared to the other views, yet also doesn’t match the size of them.
The art is cool though, so it can stay for now. There’s also the risk that changing it now means I tinker with that forever, and get nothing else done.

I don’t think I can avoid tilemaps any longer. They are the blocker on this section of the roadmaps. I’m not sure why they scare me so much – I think I saw a scary Youtube video at some point.
Improving The Ship Class
In my ongoing quest to avoid doing tilemaps, which will probably end up being
one of the simplest concepts in Godot, I have refactored yet more code
into the Ship class. The result is that the The Amber Plague’s gdscript has
been reduced further into simply:
extends Ship

func _process(delta) -> void:
    var direction =
        Input.get_vector("move_left", "move_right", "move_up", "move_down")
    var v_delta = direction * accel * delta
    move_and_set_animation(v_delta, delta)
    move_and_slide()
Whilst the ship class previouly had methods to do this, they had to be manually
called to get the facing direction, to set the speed, to the animation
name for the direction, to make the sprite play said animation, etc.
It’s now all done by move_and_set_animation. Three cheers for encapsulation!
It will expand again once I add actual mechanics to the game, no doubt about it, but for now it’s nice and clean.
Enemy ships are even better off – they require no script whatsoever. The
Ship class’s _process function handles it all for them, no override needed.
Though The Amber Plague will more than likely require more bespoke code, with
the enemy ships I should be able to keep their entire code in the class.
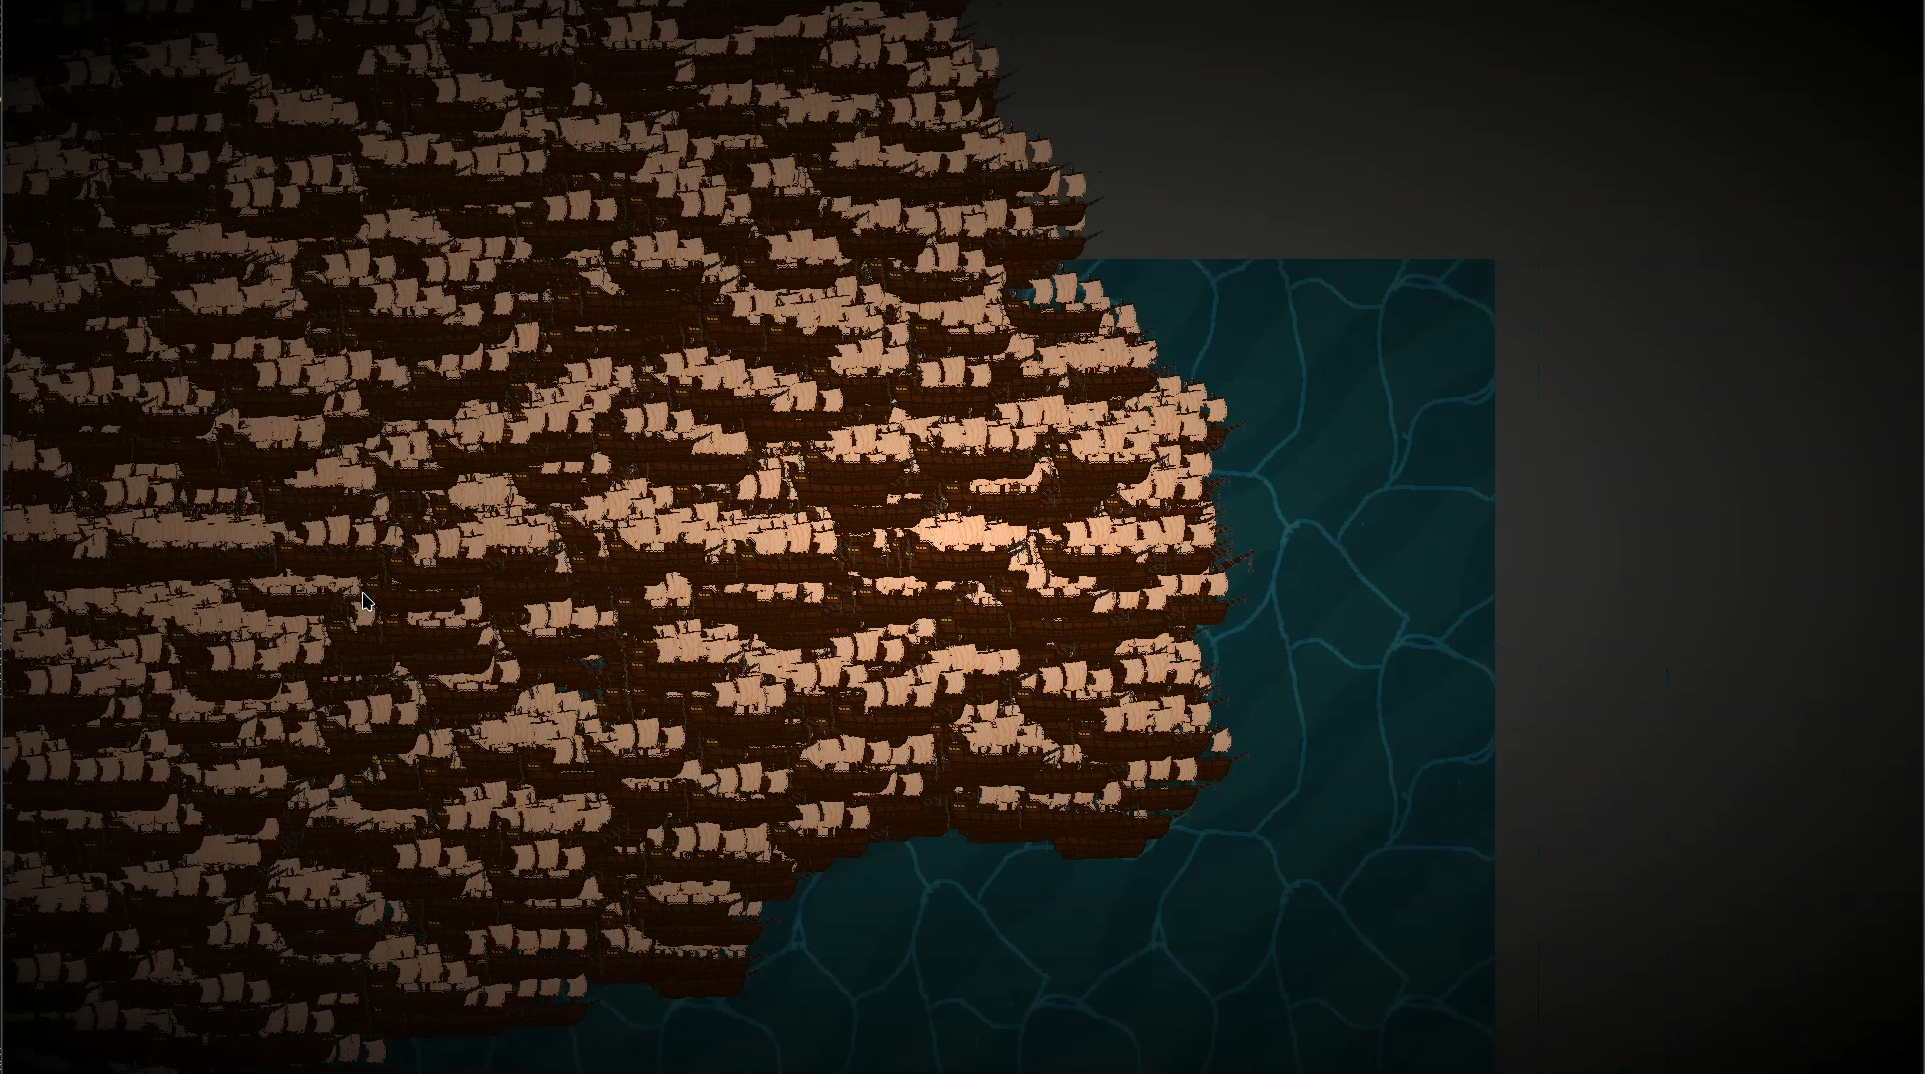
To celebrate my successes, I set up a simple enemy ship example and spawned in five thousand of them.
A Quick Note on Tilemaps
Tilemaps are actually pretty easy! I only went into the basics, but even the more advanced usage doesn’t look too bad. All my fear was for nothing!
Except.
It wasn’t tilemaps I needed. My thinking was that it should be possible to infinitely generate tile maps wherever the player moved. Unfortunately, tilemaps don’t do that and aren’t for that. There’s probably a way to make it work by making a big one and teleporting it under the player every time the water/waves animation finishes (and starts again) or something, but that sounds 1) really hacky, and 2) unsustainable when I want to add more levels.
This is meant to be a fun cool game, but it’s also a learning experience for me, Kay, and doing hacky stuff doesn’t progress that goal. I’ll happily hack away in a gamejam (like Death’s Season – some of the level scenes in that are duct taped together), but I want to gain something from more from this. There’s no rush – life is about the journey too:)
Anyway, once I’ve watched the hour of so of videos that I have queued up, I’ll be back.
An Even Quicker Note on Tilemaps
I think it is tilemaps I need actually. Create a few chunk tiley things, and procedurally generate them in a tilemap.
Tilemaps manually are nice! Tilemaps in code are less so. I’m struggling to actually get them to generate automatically – given there’s a couple hundred tiles I want to generate, doing it by hand isn’t feasible. Anyway. Back to it.
PS. I haven’t forgotton about Seasick, but Stardew Valley got its claws deep into me again, and is sapping all my time. I have very little self control.
Stardew Valley: Whaling
This is more a vague idea than a real project I’m going to pursue, but wouldn’t it be cool if cozy game Stardew Valley had whaling? A three day event (for example) where you go and commit an act of environmental hatred and also earn shitloads of cash from it. I think it would be cool.
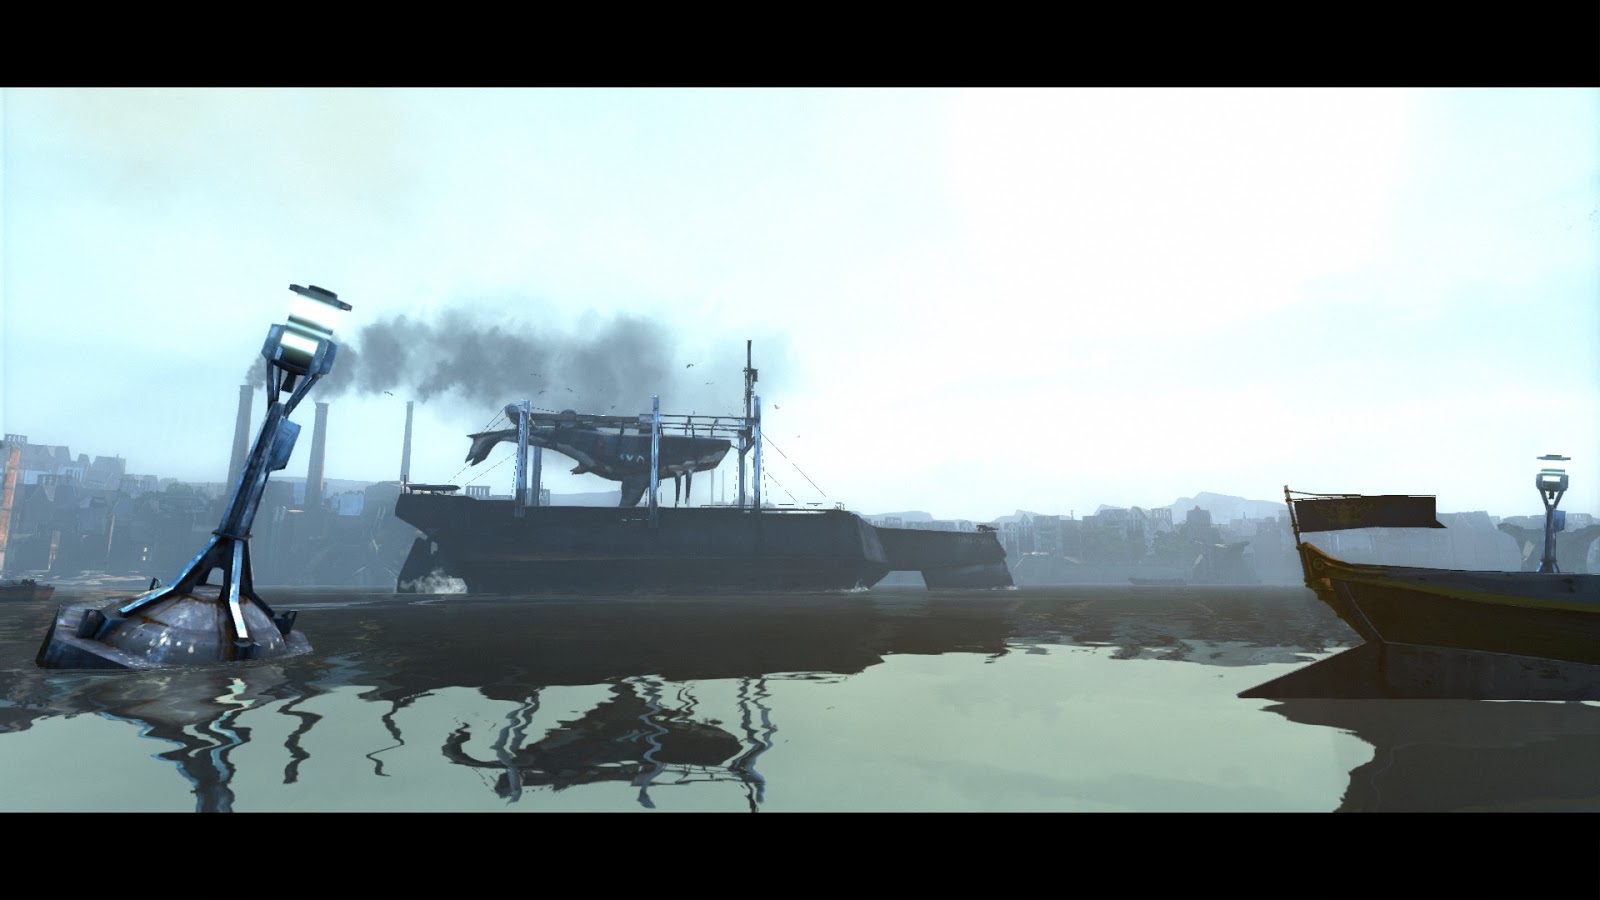
I haven’t really thought through how it would actually work other than get on a ship with Willy or maybe custom whaling NPCs and go hunt whales. I like the idea of having ships like in Dishonored that carry the whale. To my knowledge this particular part of the ship was fictionalised (though the rest of the ship were heavily inspired by real trawlers).
I’ve looked on Nexus but couldn’t find anything about a preexisting mod for this. Maybe I’ll make my own, though that will mean learning C#.
Feel free to steal this wonderful idea – just tell me if you do so I can play it.
Stardew Valley: Carmel NPC
Once upon a time I wrote a book called All Consuming. I thought it was good, but no-one else bothered to read it :(. Anyway, moving on from the traumadump, it followed a doctorate student Carmel. In a stroke of self-inflicted bad luck, she dug up and stole a Drosera plant that had a dryad’s soul bound to it. The book was horror / litfic (if I may be so bold as to say that).
Carmel studied botany, specifically carnivorous plants such as pitcher plants, venus flytraps, and sundew plants – like the Drosera in question.
(Sidenote: All Consuming is the reason my
Markdown Converter
converter was written. All Consuming was one big .md file, and I wanted to
look at it in mdbook.)
I wrote it before I watched Twin Peaks, but All Consuming turned out to be very similar to it in terms of vibe. In the same way, Stardew Valley is very similar to Twin Peaks, but on the other side.
All Consuming <–> Twin Peaks <–> Stardew Valley.
Therefore, to me, it makes sense to bring in Carmel as an NPC. Tone down the horror from All Consuming, run the major plot points, and voila – one Irish doctorate student to seduce by gifting them something every day.
Again, rough idea. Maybe I’ll do it.
Creating Carmel
I decided to have a go at this – how hard can it be? So far it seems okay.
That being said, Content Patcher seems to be a powerful tool but it demands a
lot of json.
There’s probably some wonderful editor out there which will do all the json
and what not for me, but I prefer to save 10 minutes of research by doing 2
hours of typing.
So far, I’ve managed to create an NPC that wears Abigail’s skin and has a single line of dialogue.
As mentioned above, a lot of the actual heart events and story / dialogue can be ripped out from the book.
There is a concern lurking in the back of my mind that a single NPC of Carmel won’t be enough. The dryad in question is Olivia*, and she is integral to the story of All Consuming as Carmel is; it may be the case that two NPCs are required. It’s almost certainly the case that two NPCs will be required, in fact.
There is a further concern that Carmel needs somewhere to live and I’ll need to build her a house. As she is a PhD student, she’ll also need somewhere to work – I’ll probably hijack Demetrius’s lab for this, to make life easier. He’d probably be cool with a botany student sharing the space.
Giving into horrendous scope creep, I also think it would be cool to add seeds and growable carnivorous plants. Maybe without the bound spirits though.
*(Her full name is Olivia Sarah and she’s a doctor -> Dr O. Sera. I thought this was funny.)
She Lives
There’s a lot to do, so I just got started. I think it was pretty productive.
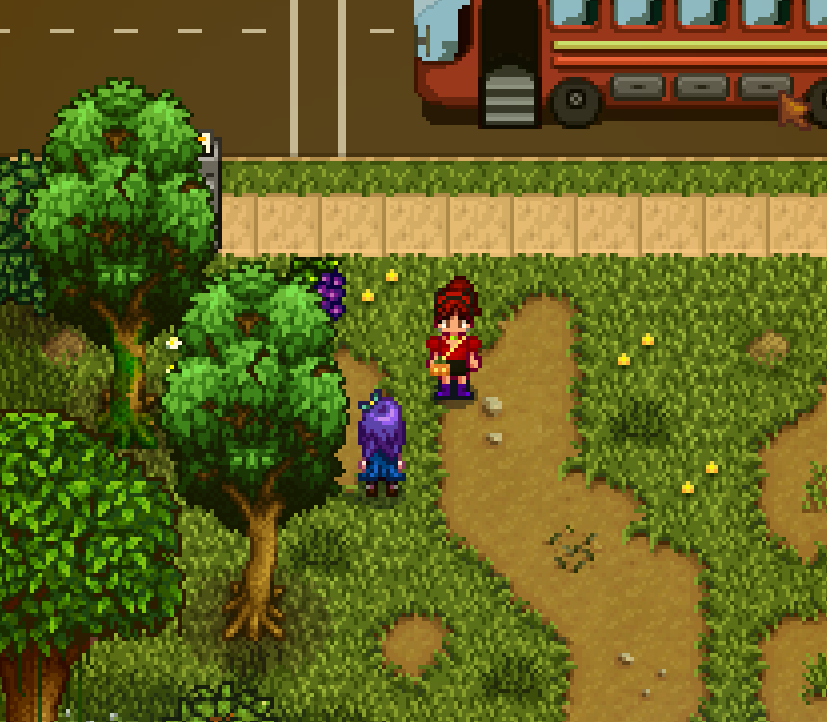
Carmel now has her own sprites. Kinda. She has a front facing body, a cool outfit, and animated walking / hair. From the side and back she’s still stealing Abigail’s skin, but a visage of Carmel is forming.
Unfortunately it was pissing it down when I took this picture but it give the
idea:
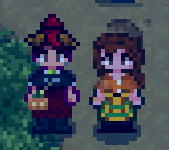
The sprites as is are “fragile”. I need to split them out into parts so I can easily swap and change them, add themed outfits, etc. Currently, all of Carm’s sprites are on a modified Abigail’s spritesheet. If I wanted to change a single part of her outfit, there’s four different sprites to modify (just for the front facing sprites alone). Having them all separated out into parts just makes things easier to change, and import into the relevant spritesheet as required. I’m pretty sure there’s some kind of tool for that. I’m sure I can whip something up if not.
Her first outfit was a white shirt and green trousers. I was aiming for some kind of dark academia look – it ended up as Peter Griffin. On my second attempt, I used these magical things called references and I think it went pretty well:
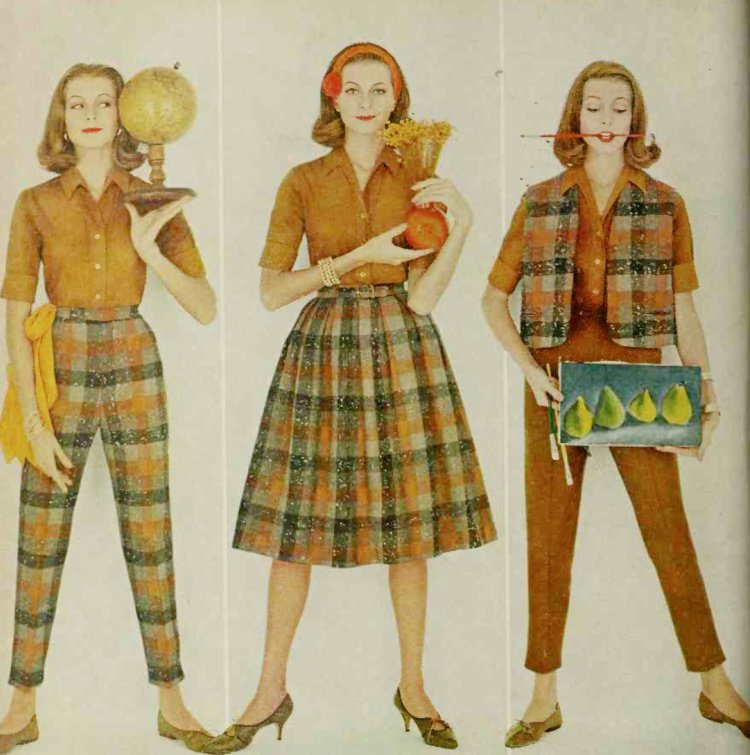
Many thanks to this article for the picture: https://www.avintagenerd.net/2022/09/1960-plaid-fall-fashion-inspiration.html. I’ll almost certainly be returning to this site for more inspiration.
In further news, I’ve planned out her heart events, based mainly on the key plot points from the book. And if that wasn’t enough, I’ve also started adding her dialogue – she can say “Hello $farmer” now. As written, I hopefully won’t need a second NPC for Olivia. We’ll see how well that holds up in practice.
Speaking of heart events, she also has placeholder dialogue following these –
whether this actually works or not remains to be seen. Rather than just use the
standard “memory” keys, I’ve used where {...} clauses in the content.json
to load the dialogue once a certain heart event has been seen, as this will
work much better than for the story. Once the heart events are active (or at
least can be in a completed placeholder state) then testing can begin.
A Timeskip Since the Last Entry
My steamdeck charger broke, which doesn’t sound too bad on its own – but I use my steamdeck for everything. It’s my main computer at this point (in desktop mode), so being unable to use it is a pain. Luckily, one quick online order later, I got a new charger.
First things first: I hate JSON.
Secondly, even before the charger broke, I apparently missed ~3 sessions worth of updates.
Dialogue
Carmel has a whole bunch of dialogue for her. She has a line for each season start, a single “set” of daily lines, an intro line for the first conversation, and generic dialogue mapped for the heart events as above (by which I mean she has dialogue following the heart events that fits the tone I want, but it’s only a single set so will get boring).
Still to write is festival dialogue, more “general” dialogue, gift dialogue, place dialogue, and dialogue for the heart events themselves. It sounds like a lot all listed out, but a fair amount will already be written in the book itself, so it’s just a case of ripping it out.
On a separate note, I have decided to go the path of ripping direct quotes from All Consuming where possible. It makes sense to me to do it this way.
Sprites
I broke up Carmel into a whole load of pieces. Limbs, head, face, hair, fringe – you name it, and there’s a chunk of Carmel to match.
As part of this, I also made her a load more sprites for the side-on and rear views. This includes the frames to make her walk! She has a hell of a limp because something isn’t quite lined up right, but she happily hops along regardless.
So far? Hasn’t actually made things easier. Mea culpa: I have simply stuck the Carmel Chunks into a single big Pixelorama file to copy paste from, rather than actual composable assets.
Looks like I’ll need to refine this somewhat
Schedule
Carmel also has a schedule too! She starts at the bus stop at 6:10AM, then goes to work. Her being a botanist, she goes to work in the lab with Demetrius. Again this is somewhat based on the book – there, she works in Brookheda University as a doctoral student.
Sidenote: in the content patcher language(?), Robin’s house is called
ScienceHouse
despite the fact that – to me, at least – the main function is being the
carpentry shop. May as well call it MaruBedroom.
Im any case, after a long day at he lab, Carmel goes and looks at plants in the forest. After that, she goes back to the bus stop – except on weekends where she spends all day in the forest bemoaning the fact she can’t do her research; and in winter where she goes straight back to the bus stop. The plan later on is for her to go to a real home, the saloon, the library, etc.
Events
Thus was supposed to be today’s post, until I discovered how lax I’d been previously.
Carmel now has her first heart event, for 2 hearts.
I say event – its a placeholder where there’s a black screen and two pieces of dialogue from her. But it triggers where it’s meant to, and when it’s meant to which is a success in my eyes.
Farmer ModTest was my Grandfather’s name…
…Please, call me Zoe.
So far I’ve been using my real character for testing. This has proven to be unwieldy and carries a risk of fucking the whole save up, so I’ve created a new farmer with a whole bunch of cheats to test how happy Carmel is.
My actual save still has Carmel in it, but I dont have to use timeskip cheat and friendship level editors to test her events/dialogues/etc.
That concludes today’s post. I’ll come back and add images at some point. Tune in next time, whenever that may be. Probably more heart event stuff.
My Favourite Stuff
In no particular order:
Movies
- Raw (2016)
- Pearl (2022)
- Pirates of the Caribbean: Dead Man’s Chest (2006)
- Blade Runner 2049 (2017)
- The Godfather (1972)
- Akira (1988)
Games
- Prey (2017)
- Dishonored (2012)
- Fallout New Vegas (2010)
- Control (2019)
- Satisfactory (2019)
- Ready or Not (2023)
- Stardew Valley (2016)
- The Simpsons: Hit & Run (2003)
Albums
- Pure Heroine – Lorde
- My Beautiful Dark Twisted Fantasy – Kanye West
- Seed – Looming
- I Don’t Like Shit I Don’t Go Outside – Earl Sweatshirt
- Goners – Laura Gibson
Books
- Tender is the Flesh – Agustina Bazterrica
- Our Wives Under the Sea – Julia Armfield
- Piranesi – Susanna Clarke
- Paradise Rot – Jenny Hval
- Carmilla – J. Sheridan Le Fanu
TV
- Twin Peaks
- Taskmaster (UK)